Microneedling at Home After 40: The Honest Protocol
Microneedling is one of the few at-home tools with real clinical evidence. It's also the easiest to do badly. The honest protocol — depth, frequency, what to layer with — for adult skin.
Microneedling — creating thousands of tiny controlled punctures in the skin to trigger collagen production — has real clinical evidence behind it. It also has more failure modes than almost any other at-home skincare tool. Done correctly with the right needle depth, sterile technique, sensible frequency, and the right products layered around it, microneedling delivers measurable improvement in fine lines, texture, and pigmentation for most adults. Done casually with a drugstore roller and a $5 serum afterward, it produces inflammation, infection, and in worst cases scarring or hyperpigmentation. After 40 the upside is bigger (your collagen production needs the push) and the downside is bigger (mature skin scars and pigments more readily). This guide separates what the evidence actually supports from the marketing, walks through the honest protocol, and tells you when the right answer is a dermatologist's office instead of your bathroom.
What microneedling actually does
The mechanism is well-established. Needles puncture through the epidermis into the upper dermis, creating microchannels that trigger a wound-healing cascade. Fibroblasts ramp up collagen and elastin production over the following 4–8 weeks. Repeated treatments (4–6 sessions, spaced 4–6 weeks apart) produce visible improvement in:
- Fine lines, especially around the eyes and mouth
- Skin texture and pore appearance
- Atrophic acne scars
- Stretch marks (with deeper devices)
- Mild to moderate hyperpigmentation
The temporary "microchannels" also allow topical serums to penetrate measurably deeper than they would on intact skin, which is where the "microneedling + vitamin C" or "microneedling + growth factors" protocols come from. This penetration enhancement is real but has to be done carefully — applying the wrong product post-needling can cause irritation, infection, or hyperpigmentation that wouldn't happen on intact skin.
What microneedling doesn't do reliably at home:
- Erase deep wrinkles (those need fillers or laser resurfacing — see cosmetic procedures after 40 — what's worth it)
- Lift sagging skin (the structural support isn't a collagen-density problem)
- Treat active acne (it can spread bacteria and worsen breakouts)
- Replace retinoid therapy (different mechanism, complementary not substitute)
Depth changes everything
The single most important variable in at-home microneedling is needle depth. Get this wrong and you either do nothing useful (too shallow) or do real damage (too deep).
| Needle depth | What it does | Frequency | Safe at home? |
|---|---|---|---|
| 0.20–0.25 mm | Improves product penetration, mild surface refresh | 2–3× weekly | Yes, very safe |
| 0.5 mm | Mild collagen stimulation, evens texture | Every 2 weeks | Yes, for educated users |
| 1.0 mm | Real collagen stimulation, treats fine lines and pigmentation | Every 4 weeks | Borderline — at the upper limit of home use |
| 1.5 mm+ | Treats acne scars, stretch marks, deeper wrinkles | Every 4–6 weeks | No — professional only |
| 2.0–2.5 mm | Significant remodeling | Every 6 weeks | No — clinical only |
For most adults at home, the right device is a 0.5 mm or 1.0 mm needle stamp (not a roller — more on that below). Anything deeper requires either professional training or a dermatologist.
Why rollers fall short and stamps win
The classic "dermaroller" — a cylinder of needles you roll across the face — is the original at-home microneedling tool and is mostly obsolete for serious use. Three problems:
- Inconsistent depth. As the roller drags, needles enter at angles that vary from puncture to drag, producing micro-tears rather than clean channels. The micro-tear pattern actually impairs healing compared to perpendicular needling.
- Cross-contamination risk. The roller geometry makes sterilization difficult; bacteria from one area can be deposited elsewhere on the face.
- Pulled skin and bruising. Rolling drags skin, especially under the eyes, producing more bruising and slower healing.
Stamping devices (often called "pen" devices for the higher-end clinical ones, "stamp" for at-home versions) drive the needle straight in and pull it straight out. Cleaner channels, more predictable depth, easier sterilization. For at-home use, devices like the BeautyBio GloPRO (0.3 mm), Dr. Pen A1 or A6 (depth-adjustable 0.25–2.0 mm), or the lower-priced Sdara stamp are the credible categories.
True at-home pens that go to 1.5 mm or deeper exist on Amazon and elsewhere. Don't buy them unless you're prepared to genuinely understand what you're doing. The depth that worked in a clinical study under sterile conditions with trained operators is not the depth a self-administering adult should match on a bathroom counter at 11 p.m.
The honest protocol
For an adult new to microneedling, here's the conservative protocol that produces real benefit without serious risk.
Tool: 0.5 mm stamp device from a reputable brand. Single-use sterile cartridge if available.
Frequency: Every 2 weeks for first three sessions, then every 4 weeks ongoing. Watch how your skin responds.
Prep (24 hours before):
- Skip retinoid, exfoliating acids, vitamin C the night before
- Clean face thoroughly, avoid heavy moisturizers
Day-of (the session itself):
- Wash face with a gentle cleanser, pat dry
- Wipe device and skin with 70% isopropyl alcohol; let dry fully (60 seconds)
- Apply a thin layer of clean hyaluronic acid serum (no actives, no fragrance — The Ordinary HA is the prototype)
- Stamp methodically in overlapping passes — forehead, cheeks, jawline, chin. Avoid lips and immediate eye area unless you have an attachment designed for it.
- Total active time: 5–8 minutes on the face. Stamp pattern, not random.
- Pinpoint bleeding in a few spots is normal at 0.5 mm; significant bleeding means you're at too deep a depth or pressing too hard.
- Apply post-needling serum (see next section).
- Disinfect device, store dry. Replace cartridge per manufacturer instructions.
Aftercare (24–48 hours):
- Skip retinoid, vitamin C, acids, aggressive cleansers
- Sunscreen non-negotiable for at least a week — newly remodeling skin pigments easily
- Sleep on a clean pillowcase (see what your sheets do to your skin and smell)
- No makeup for 12+ hours
- No exercise for 12 hours (sweat into open channels = bad)
What to layer with microneedling
Post-needling serum choice matters enormously. The wrong product gets driven deep into skin where it shouldn't go.
Good post-needling serums:
- Hyaluronic acid (HA). Plain, fragrance-free, low molecular weight. Restores hydration, supports healing, no risk profile. The default.
- Peptide serums. Copper peptides, palmitoyl tripeptides — support collagen synthesis through complementary pathways. See peptides for skin over 40.
- Growth factor serums. Plant or bio-engineered growth factors (EGF, bFGF). Stronger evidence than the price suggests; the high-end versions (SkinMedica TNS Recovery Complex) have real clinical backing.
- Niacinamide at 5%. Supports barrier and modestly evens tone. Safe.
Skip immediately post-needling:
- Vitamin C (L-ascorbic acid). Acidic, irritating into open channels. Use it the rest of the week, not on needling day. See vitamin C serum for skin over 40.
- Retinoids. Same reason. Resume 48 hours later.
- AHAs, BHAs. Same.
- Fragranced anything. Becomes a deep dermal irritant.
- Essential oils (tea tree, etc.). Same.
- Sheet masks with unknown ingredient profiles. Stick to single-ingredient hyaluronic acid serum and basic moisturizer for 24 hours post.
What about microneedling stamps for under-eyes and around the mouth
The areas with the thinnest skin (under-eye, immediate orbital area) and most movement (around the mouth) benefit most from microneedling — and are also the riskiest. For these areas:
- Use 0.25 or 0.3 mm depth only at home; deeper needs a professional
- Stamp very gently — the underlying tissue is thin
- Avoid the lower eyelid entirely; the orbital bone shifts and the skin is too delicate
- Around the mouth, stamp the perioral lines (above and below the lip) but not the lips themselves
For most adults, the under-eye work is better done in a dermatologist's office. The fine vertical lines around the lip can be addressed reasonably at home with care. See lip care for men after 40 for the broader lip area approach.
When to skip at-home microneedling entirely
Some adult situations make microneedling at home a bad idea:
- Active acne. Spreading bacteria across the face. Treat the acne first; see adult acne after 40.
- Active rosacea or eczema flare. Inflammatory skin doesn't respond well to controlled injury.
- Recent isotretinoin (Accutane) use. Skin healing is impaired for 6–12 months after. Wait.
- Keloid-prone skin. Even controlled needling can trigger keloid scarring.
- Pregnancy or breastfeeding. Caution with active ingredients pre/post.
- Taking blood thinners. Excessive bruising and bleeding.
- Active cold sore. Needling can spread herpes simplex virus across the face. Wait until fully healed.
- Recent fillers (within 2 weeks). Don't disturb the placement.
If any of these apply, a board-certified dermatologist conversation is the right move rather than home use. The procedure done professionally (RF microneedling, fractional laser as alternatives) gives better results with managed risk anyway.
What about microneedling for men
Same protocol with two adjustments:
- Beard areas need a more careful pattern. Stamp around but not into the beard line; needling into hair follicles can cause folliculitis.
- Shaving compatibility. Don't shave the same day as needling or 24 hours after. The skin is too compromised. See shaving after 40 — tools and technique.
This is a useful tool for men dealing with adult acne scarring, fine lines from years of sun, or texture from chronic shaving irritation. See skincare for men after 40 — what's different for the broader male skincare framing.
Realistic timeline and expectations
The honest expectations chart:
| Timeline | What to expect |
|---|---|
| First 24 hours | Redness, slight bruising, occasional pinpoint scabbing |
| 2–4 days | Skin feels rougher (dead surface layer sloughing); usually resolves with moisturizer |
| 1 week | Skin looks brighter, smoother; "glow" effect peaks |
| 4 weeks | Subtle improvement in fine texture starts showing |
| 12 weeks (3 sessions in) | Real measurable change — finer texture, mild line softening |
| 6 months (6+ sessions) | Visible improvement in deeper concerns |
If you're not seeing results by month 3 with consistent monthly sessions and the right products, the depth might be too shallow, or you might be a candidate for in-office treatment rather than at-home.
Common mistakes
- Buying the cheapest device on Amazon. Quality varies enormously. Buy from a brand with real reviews and accessible customer support; you're putting needles in your face.
- Reusing cartridges past their indicated lifespan. Dulled needles produce uneven channels and more inflammation.
- Microneedling more than every 2 weeks at 0.5 mm. Skin needs full healing cycle; pushing produces inflammation, not faster results.
- Going deeper than 1.0 mm at home. The risk profile changes sharply above 1.0 mm — professional territory.
- Using vitamin C, retinol, or actives post-needling. Open channels turn helpful actives into irritants.
- Skipping sunscreen the week after. Newly remodeling skin pigments fast; you can produce hyperpigmentation you'll spend months treating.
- Wearing makeup the same day. Bacteria and pigment particles drive deeper than intended.
- Ignoring pinpoint bleeding as "fine." Means depth or pressure is too much. Reduce next session.
- No protocol, just whim. "I felt my face needed it" is not the right reasoning. Schedule monthly, document.
- Skipping a patch test. Even with the right protocol, your skin response is yours. Start on a small area; observe.
FAQ
Is at-home microneedling actually worth it vs in-office? For mild-to-moderate concerns, yes — at-home at 0.5 mm produces real benefit at a fraction of the cost. For significant concerns (deeper scars, sagging, hyperpigmentation patches), in-office with deeper-depth pens or RF microneedling is meaningfully more effective. The cost-benefit splits between mild and serious cases.
How much should I spend on an at-home device? The credible range is $80–250 for a depth-adjustable stamp pen. Below $50 the quality is suspect; above $300 you're paying for branding more than function. Replacement cartridges are an ongoing cost — factor $5–15 per session.
Can I microneedle and use a retinoid? Yes, on different nights. Use retinoid 5+ nights per week; microneedle every 2–4 weeks; pause retinoid 48 hours before and after needling. They work synergistically on collagen, not against each other.
Does it hurt? At 0.25 mm — barely. At 0.5 mm — mild prickly sensation, manageable without numbing cream. At 1.0 mm — noticeable; many people use a topical numbing cream (4–5% lidocaine) 30 minutes before. At 1.5+ mm — significant, professional territory.
How do I know if I had a bad reaction? Mild redness for 24 hours is expected. Worrying signs: spreading rash, fever, significant swelling, pus, severe pain, or new pigmentation patches appearing in the days after. Stop sessions; see a dermatologist.
Can I microneedle if I have melasma? With great caution. Microneedling can both improve and worsen melasma depending on technique and aftercare. The safer approach is professional protocols specifically designed for melasma. Home use without a guiding dermatologist is risky for this concern.
Should I microneedle my chest and neck too? Yes — these areas show aging early and respond well. Use the same protocol, similar depth. The neck especially benefits because skincare often stops at the jawline. See neck and décolletage care after 40.
How do I sterilize the device between uses? Wipe with 70% isopropyl alcohol, let air-dry fully. If cartridge is reusable per manufacturer (most are single-use, technically), follow their instructions exactly. Store dry in a sealed container, not in a humid bathroom.
Related guides
If this landed, the natural next reads are cosmetic procedures after 40 — what's worth it, retinol for beginners after 40, and peptides for skin over 40. For broader anti-aging strategy, anti-aging skincare in your 50s.

How to Prepare Your Skin Before Summer: The Adult Pre-Sun Protocol After 40
Adults who treat summer skin protection as a day-of project lose ground every year. The honest pre-summer protocol that pays back for months of consistent outdoor exposure.
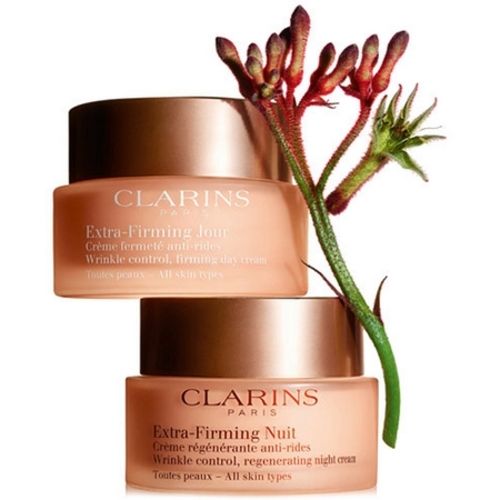
Clarins Extra-Firming: The Honest Adult Take on Firming Anti-Aging Cream
Clarins Extra-Firming has been the reference firming cream for adults over 35 for two decades. The honest assessment of what it does, what it doesn't, and where it fits in an adult routine.

Ferulic Acid for Adult Skin Over 40: The Underrated Antioxidant
Ferulic acid is the antioxidant that stabilizes vitamin C, extends UV protection, and gets ignored in mainstream skincare. The honest adult guide.